

A secure shell works just like Telnet, SSH allows a user to access a device remotely to manage it. In SSH the connection between the user and the remote device is encrypted and secure including usernames and passwords.
- Secure shell (SSH) is a client-server protocol, an SSH
client is a PC, and an SSH server is a remote device such as a router, switch, or
firewall. When we establish the connection a network admin can execute
commands on the remote device which could be a route, switch, or firewall.

- We know that having the talent to manage remote devices is not exactly a security best practice because of talent's lack of security. Instead, the accepted alternative to talent is a Secure shell as we discussed earlier encryption and security of SSH.
- We have two versions of Secure Shell (SSH) and SSH version 2 is an IETF standard in this lab we are using SSH version 2. SSH version 1 is not secure compared with version 2. We need to set up access to the Cisco device for SSH, we need a user account on our remote device.

By default, telnet is enabled but, in a few
steps, we can configure a secure shell: -
- First, we must ensure that our IOS supports SSH.
- Configure a hostname if you already preconfigure that is good if not then we need to configure the hostname.
- Configure domain name if it preconfigures then well and good if it's not then we need to configure.
- Configure client authentication.
- Configure a server (router, switch, or firewall) to generate the RSA (Rivest-Shamir-Adelman) key.
- Configure the SSH version.
- Enable SSH on the VTY lines.

- configure the topology as per the diagram.
- configure user name cisco and password cisco321 on both SSH servers.
- assign IP address to their interfaces.
- configure domain name internetworks.
- configure SSH key1024 bit on both SSH servers.
- configure default gateway 192.168.10.1
- configure VLAN interface address 192.168.10.100/24
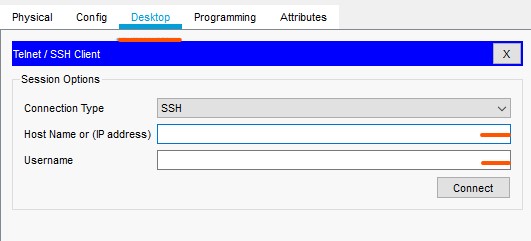
- make sure PCs get full access remotely to our router and switch.
.
Router(config)#hostname ROUTER_1
ROUTER_1(config)#username cisco privilege 15 password cisco321
ROUTER_1(config)#ip domain-name internetworks
ROUTER_1(config)#crypto key generate rsa
The name for the keys will be: ROUTER_1.internetworks
Choose the size of the key modulus in the range of 360 to 2048 for your
General Purpose Keys. Choosing a key modulus greater than 512 may take
a few minutes.
How many bits in the modulus [512]: 1024
% Generating 1024 bit RSA keys, keys will be non-exportable...[OK]
ROUTER_1(config)#line vty 0 4
*Mar 1 0:18:13.680: %SSH-5-ENABLED: SSH 1.99 has been enabled
ROUTER_1(config-line)#login local
ROUTER_1(config-line)#transport input ssh
ROUTER_1(config-line)#exit
ROUTER_1(config)#interface gigabitEthernet 0/0
ROUTER_1(config-if)#ip address 192.168.10.1 255.255.255.0
ROUTER_1(config-if)#no shutdown
ROUTER_1(config-if)#exit
Switch(config)#hostname SWITCH-1
SWITCH-1(config)#username cisco privilege 15 password cisco321
SWITCH-1(config)#ip domain-name internetworks
SWITCH-1(config)#crypto key generate rsa general-key modulus 1024
The name for the keys will be: SWITCH-1.internetworks
% The key modulus size is 1024 bits
% Generating 1024 bit RSA keys, keys will be non-exportable...[OK]
*Mar 1 0:26:11.185: %SSH-5-ENABLED: SSH 1.99 has been enabled
SWITCH-1(config)#line vty 0 4
SWITCH-1(config-line)#login local
SWITCH-1(config-line)#transport input all
SWITCH-1(config-line)#end
SWITCH-1(config)#interface vlan 1
SWITCH-1(config-if)#ip address 192.168.10.100 255.255.255.0
SWITCH-1(config-if)#no shutdown
SWITCH-1(config-if)#exit
SWITCH-1(config)#end
%LINK-5-CHANGED: Interface Vlan1, changed state to up
%LINEPROTO-5-UPDOWN: Line protocol on Interface Vlan1, changed state to up
(now we need to configure IP address on our PC1)


No comments:
Post a Comment